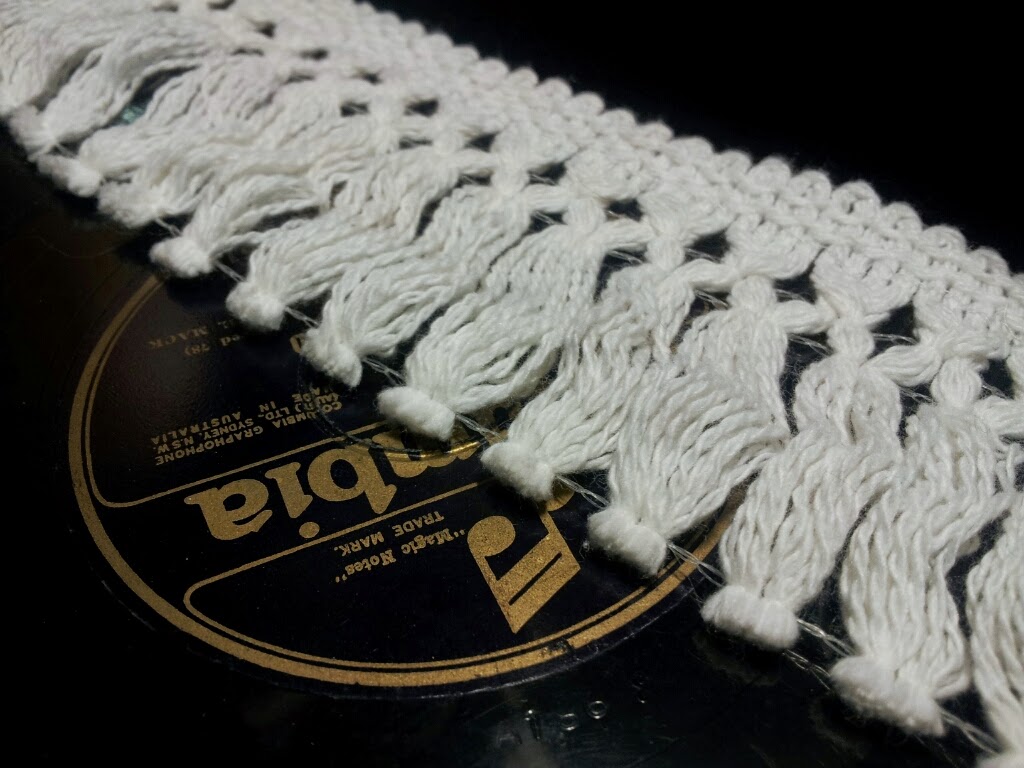
DIY: Hanging Necklace Holders

I'm about to move, so I've gotten really into DIY and interior decoration, in preparation for trying to make my scruffy student flat look a lot nicer. This is a really, really cheap and useful project I came up with recently, and I think it's worth sharing!


Necklace storage is such a hassle, because if you do it wrong you'll either end up with a tangled mess or have your jewellery in a place that makes it forgettable. Because they're so beautiful, it's nice to be able to display them too.

Note that this DIY uses Pianola Roll spools. I've had some of these lying around, for a while, having decided they were perfect for upcycling, but if you don't have that specific circumstance atm, head to an opshop or online auction. They're basically worthless artifacts, besides maybe a couple of rare or mint condition ones, so go no higher than $2 (NZD) each.


Things I used:

-Pianola Roll spool(s)
-Classic white string (the kind everyone has that never seems to run out!)
-Scissors
-Clear glue

The ingredients are pretty flexible. I used the string to decorate my spools, but you could use anything else, eg, wool, paint, paper or fabric. You don't even need a Pianola Roll spool exactly! I think they're perfect for this, but if you have something else floating around your house you think will work, try that. This DIY assumes the exact process I used will be replicated.


Method:


1. Strip your Pianola Roll sheets off so you have a naked spool. The box and sheets of the Pianola Roll could totally be used for some other project, so keep them if you want.


2. You'll find that one of the Pianola Roll spool handles either comes off completely or comes out just a little- this will be where you want to end up at, so start at the other handle. Keeping the string attached to the string spool, tie it tightly to the Pianola Roll spool, pushing it as close as possible to the handle.

3. Use a tab of glue to secure the knot. You could also use clear nail varnish. Dab a bit of glue and lay down the loose piece of string. 4. Start wrapping the string as tight as possible around the spool, going over the loose end of string to secure it.

5. It takes about 20-40 minutes to wrap a spool. Keep going around and around. It's a good thing to do whilst listening to a podcast or watching TV. If you need to get up at any point, place the spool down and use something heavy to keep the string taut. Every so often, dab a bit of glue on the spool and wrap over it, just to keep things secure.

6. When you've reached the end, pop out the handle a little bit and wrap in this small gap a couple of times. Tie a tight knot. Snip off the string and use glue to secure the knot and the shortened end of string.

7. Cut a long piece of string and tie it around the middle of your spool (or do it twice towards each end). To find the middle, tie the string loosely around approximately the centre point, then holds the string, dangling the spool in mid air. Move the string along the middle section until the spool hangs perpendicular to the string it dangles on. Tie a tight double knot, then use glue to secure the knot and the string that wraps around the spool.

8. Tie a knot and push a pin or nail through the string loop, attaching it to a wall or pinboard. I think these look nicer in duos, so make another if yours looks lonely or you have a lot of jewellery.

9. When adding necklaces, remember that you'll also need to be able to take them off! You could make it so you have to undo the clasp to take the necklace off, or simply place the necklace over the spool and pull the pendant through the loop created, so it can just be pulled off (this doesn't work so well for chunky or stiff necklaces).


Ta-da! Super easy and, more importantly, mega cheap. There are heaps of cool things you could do with these, like painting over the wrapped string or hanging one from another, go crazy.

Contributor: Kate, @Springerfield

How do you currently store your necklaces? Has this post been helpful to you?  

Pearl of Wisdom: Sewing 101

The Absolootely's 101 series has thus far covered the basics of certain forms of shopping. We've covered Etsy, Aliexpress, eBay and Opshopping. Now, things take a bit of a turn and I'm going to focus on a more DIY approach.


Being able to make your own possessions is undoubtedly an awesome skill to have in your consumer toolkit. Everyone should learn the absolute basics of sewing, because sometimes you'll need to fix things and you'll probably want to make something at some point. It's ridiculously satisfying when people ask "Where did you buy that?" and you get to say "Well, I actually made it!" Also, having an individual item tailor-made for you is pretty stellar. And it's even better when you share that with someone else by gifting them a handsewn creation.


Here are Absolootely's top tips for learning to sew and doing it economically:

-First, you need a sewing machine. A basic, second-hand one shouldn't be too expensive, like, under $50. Ask around before buying, as you'll find that your Baby Boomer relatives may have one lying around that they're not using. My mum has three I only learned about recently. People just tend to have sewing machines, it's weird.

My old Bernina Nova.
-If you're not confident, attend a course or, better yet, ask a friend for help. I've started teaching two of my good friends to sew, and it's a really fun group activity. Picking fabrics together, working out how to fix tricky mistakes, planning new projects...

-Basic sewing kits are really easy to find, but be careful, as the cheaps ones tend to be diffuclt to use. Things you'll definitely need, for hand-sewing, are hand-sewing needles, thread, some spare buttons are always useful, an easy fabric such as cotton, fabric scissors, an unpicker and pins. For machine sewing, you'll also need spare needles for your machine, a couple of empty bobbin spools for using different threads, a good sturdy desk, a rubbish bin by your machine for useless cut offs and threads, your machine's manual (if it has one) and extra parts (such as additional presser feet).

-For tutorials, there's this thing called The Internet. I won't take you step-by-step through how to thread a sewing machine and do button holes in this post, because there are heaps of tutorials available online that would do a better job!

-The best place to find pattern pieces (which are the sets of instructions and templates used to make clothing, etc) is at your local Spotlight/fabric store or at opshops. Always check the Bust-Waist-Hip measurements on the packets, same with buying clothes. Pattern pieces will let you know how much fabric you'll need, plus the details of embellishments and fastenings, on the packaging. They're really easy to use!

On older pattern pieces, the sizing charts are totally different. Be careful!
-There are two really useful 'fabrics' you'll want to become acquinted with: Interfacing and Vliesofix. Interfacing is an Iron-On (it comes in other varieties, but stick with Iron-On) fabric used to add strength and structure to other fabrics. If you're following a pattern piece, it will almost certainly require you to use Interfacing. Vliesofix is like double-sided tape. You peel off a layer, iron it onto a piece of fabric, peel off another layer, then iron that fabric + adhered Vliesoflix to another piece of fabric. Bam, two pieces of fabric stuck together, with one piece of Vliesoflix inbetween. Vliesofix is almost always used for applique. It's really useful.

-80% of the time I commit to working on a sewing project is spent ironing and pinning/cutting fabric. Sewing without ironing is foolhardy, trust me, I used to do it. Never hem without ironing first. NEVER. And get prepared to wear out your fabric scissors.

So. Much. Cutting.
-The fastest way to ruin a sewing project and waste your time/energy/money is, ironically, to go too fast. I know, you want to get it done ASAP, but this ain't Project Runway. Take your time, have loads of breaks, make sure you're eating well, keep track of the time. Don't rush. Unless you're on Project Runway, or have a deadline. Then, you are excused.

-The best way to get into sewing is to start with little projects. I spent my summer holidays just making plushies when I was a young lass, both by hand and with a machine. It's best to learn by doing. Namely, you'll make a million mistakes and learn how to fix them, so you'll be ready when you're doing a project that has higher stakes. Plushies and pencil cases are where most people start sewing. They teach you about zips, buttons, buttonholes, hems, seams, patterning and many other basics.

-Before you throw out that ugly old dress, stop and check it over. Could you use the fabric for something else? Are there any zippers or buttons you could scavenge? Is there a way you could improve the garment?

I hope this helped get you into the spirit of sewing! It's a fantastic hobby that no one has ever regretted learning. If you're currently in the middle of a project or about to start one, let us know in the comment section!

Contributor: Kate, @Springerfield

DIY: If You Hate It, Then You Should Just Put A Fringe On It

...I think I just improved 'Single Ladies'.


One of the best things a human being can do is to put a trim on something (no joke). It covers an ugly or raw hem, adds length and weight and imbues things with an extra dose of flair. Plus, it's really easy and inexpensive.

BEFORE
I bought this Glassons dress second-hand and was surprised when I tried it on and found that it was VERY short. This is unusual for Glassons, who usually go for added length in their dresses and skirts. It didn't help that the dress is very floaty, so a mere gust of wind would put me in an awkward position.

AFTER
Adding a fringe to this dress added length by literally adding to the length of the garment, and it also weighed the bottom hem down, so the skirt section sits better now and the fabric is stretched out nicely. Trims are just great like that.

Here is a very generic (as there are loads of different types of trims and things to attach them to) guide to applying a trim:

1. Measure how much you'll need, and get a bit extra. Guessing tends to leave you short, as it's very hard to tell by sight just how much trim you'll actually need. Do measure before buying!


2. Starting at a seam, pin the trim on. Don't be lazy and think you can just sew it straight on. Pin carefully and diligently. I pinned every inch or so, which took a while, but luckily I had a very tedious Finance lecture to watch.


3. Sew at least 2 lines of straight stitch (or in certain cases, you may want to use zigzag or applique stitches) to secure the trim. Sew with the fabric facing down and the trim facing upright, using the trim as a guide. Avoid sewing too close to the edge of the fabric, as you might miss it and just sew onto the trim. With a thick trim like the one I used, you can use a pretty long straight stitch, which will be faster and look better.


4. Where the trim ends/starts, secure with a zigzag or overlocking stitch. You may also want to use glue to stop the trim from fraying or undoing. 


So easy! I'm so into a fringe, if you haven't already noticed. It adds a effortless "boho chic" vibe to things and makes them just that little bit cooler. Happy Trimmin', everyone!


Contributor: Kate, @Springerfield

DIY: Detachable Collar

Can also be used to dress up your pup, which is a bonus.
If, like me and my dad, this is your favourite ever moment from The Big Bang Theory, then have I got the project for you!

 I mentioned that I wanted to give making a detachable collar a go, but I'd gotten rid of a blouse that was an excellent candidate. Thankfully, I was idling through a box of old clothes and I found this excellent shirt that I bought from Supre about three years ago.


The problem with this shirt is that it looks a bit like the 70s threw up on it. It's a bit too bright and bold for me to wear without feeling like I'm in a costume. The fit is also a bit unflattering. However, I do like the print in small doses, so it's perfect for this project!

There are two types of detachable collars, and the first step is working out which of these you prefer, and which your shirt suits best:

By Miu Miu
By Carven
The shirt I'm using is chiffon polyester, so it's too light to be made into a bib (it wouldn't sit properly, unless I strengthened it). So I'm gonna take the easy route and turn it into a simple collar. I have a couple of collar tips that I'll add, to give it some extra flare.

The process is very simple, and can really be summed up in a couple of photos

Just cut the two collar segments off, exactly like this. 
I decided to add  couple of collar tips, using a hammer to lightly tap them closed.

Totally convincing! 
So easy!

Here are some links to sites with more comprehensive guides:
http://www.rookiemag.com/2011/10/diy-collars-marlena/
http://emilyjane.typepad.com/my-blog/2014/02/diy-detachable-collar.html
http://runwaydiy.com/2011/02/24/diy-miu-miu-collar/


Contributor: Kate, @Springerfield